I would like to start off by saying that you are either going to love it, or you are going to hate it. You have to have the passion not only in front of the camera but behind the camera as well. Filming turkey hunts takes a lot of time and patience and there will be numerous times in the field where nothing seems to come together, yet there will be days when it does, just like chasing that ole tom around every spring. Sometimes we are rewarded but most times we fail, that goes hand in hand with filming your hunts. I am not saying that the footage you gather will not be lasting memories, it will, but we all strive to get that “kill” on video. You have to be willing to pass up shots because either you or your cameraman was not in the right position. If you have a hard time accepting this, filming may not be your thing. Don’t get discouraged and keep after them. Keep that footage and try and learn where your mistakes happened and improve in those areas. Let’s start off by talking about the equipment needed to begin filming your hunts.

Cameras: There are several models out on the market that make fantastic videos. Choose a camera that fits your budget. Once you get into the filming and decide this is something you want to pursue, then you can upgrade and buy a better camera. Please remember, you get what you pay for. So if your objective is to get footage to share with your friends and family, I would go with a low-end camera. If the footage is to be used for TV shows, websites or for DVD’s, I would suggest going with a high-end camera. The quality of footage you are trying to achieve will be affected by the camera you choose.
Manual Focus: Whatever camera you choose, it needs to have a manual focus. As we all know so well, not every set-up is going to be ideal. By ideal, I mean nothing obstructing the view for the cameraman or the shooter. There are going to be instances where there are limbs, tall grass, branches, etc. in the way. This is where the manual focus comes in. Without it, your camera is going to be focusing on these objects in the foreground and not on the bird you are filming so a manual focus is a must. I always carry pruning shears to eliminate these situations when needed.
Low Light Settings: Another option to consider but not a necessity is low-light settings. This feature will allow you to film during low light conditions like can occur first thing in the morning when a bird flies off the roost and straight into your lap. Depending on the time this happens, you will want this feature in order to capture the footage; otherwise you will get “grainy” footage. While filming turkeys, this is not a feature I would worry too much about. Most of the time, your lighting will be just fine.
Size and weight of the camera is another option to consider. After a day in the field, that camera will get heavy. Personally, I prefer a smaller frame camera; it allows me to be portable and versatile. The maneuverability is much greater as well. It is just like toting a heavy or longer gun into the woods, after a while, it can become uncomfortable. So take that into consideration when choosing a size.
Shotgun Mics: Shotgun mics are an integral component for picking up quality sound such as gobbling and drumming. Cameras with remote mic ports allow you to use this option. Most cameras have decent audio built into them, but in order to pick up those ambient sounds, you will need a shotgun mic. I like to hear those leaves crunching, wings dragging, and gobbles rumbling when a bird is closing in on my set-up. A shotgun mic targets those dynamic sounds.
Wireless Mics: These mics are used for situations when your shooter is separated from the cameraman. It allows the cameraman to hear and pick up audio from the shooter without having to raise his voice or take a chance spooking game. The shooter can instruct the cameraman that a bird is in view allowing him to get the camera on the bird. A shotgun mic needs to still be used in conjunction with the wireless mic set-up. When using a shotgun mic, I would suggest getting a “wind sock” or “wind screen” to slip over the mic. This will reduce the wind noise if it is present.
Digital or Optical Zoom: You may encounter some cameras with digital zoom versus optical zoom. Optical zoom cameras are the ones I prefer. The larger the number, the further you can pick up images in the distance. Optical zoom uses the lens (optics) to bring the subject matter in closer whereas digital zoom enlarges a portion of the image. You may loose image quality with digital zoom cameras.
Tripod and Heads: When filming turkeys, I prefer using a tripod. Without the stabilization, your footage is going to be jerky and unstable. Choosing a good quality tripod will affect your footage along with a good quality fluid head. The smoother your panning’s are, the better images you will be able to capture. The fluid head is a must for smoother footage. I like a tripod that is quick and easy to set up as well. There will be situations where you got to get down and dirty in a hurry. The fumbling around with your equipment can cause you to bump that bird that is coming to your calling. Also, don’t be afraid about trying to conceal your tripod under some camouflage material or such….I have filmed wide-open for many of hunts and have yet busted birds. I am not saying that you can’t get busted, but just be slow with your movements.
Batteries: It is always good to have extra batteries with you at all times when you are in the field. Whenever I am filming, I leave my camera on at all times. I do this because you never know when that bird is going to step out. Since the camera is constantly on, batteries tend to die especially on those colder mornings. A little trick I use on those colder days is to keep my extra batteries in a “coozie” along with hand warmers. This trick usually extends the life of my batteries. You never know when your battery is going to die and you will need that extra one.
Protection: When I say protection, I am referring to camera protection from elements. You never now when you are going to get caught out in the rain while filming. I always carry a grocery bag in my vest to cover my camera during these situations. To be honest, I try to avoid filming when the weather is crappy. Cameras are too expensive. You take a risk in ruining them if you elect to try. There are camera rain covers available through different camera companies and they allow you to film in these conditions, they just cost more than a grocery bag.
Tapes: Be sure to use the same type of tapes in your camera. It is not good practice to change brands. This will cause the heads in your camera to malfunction. I do suggest if you have to change for emergency purposes, always clean the heads. Keep a head-cleaner tape with you at all times. Not necessarily in your vest, but with your camera equipment. Always label your tapes after the hunt. If you don’t, you will be constantly trying to figure it out and it is not good practice to view your footage through your camera.
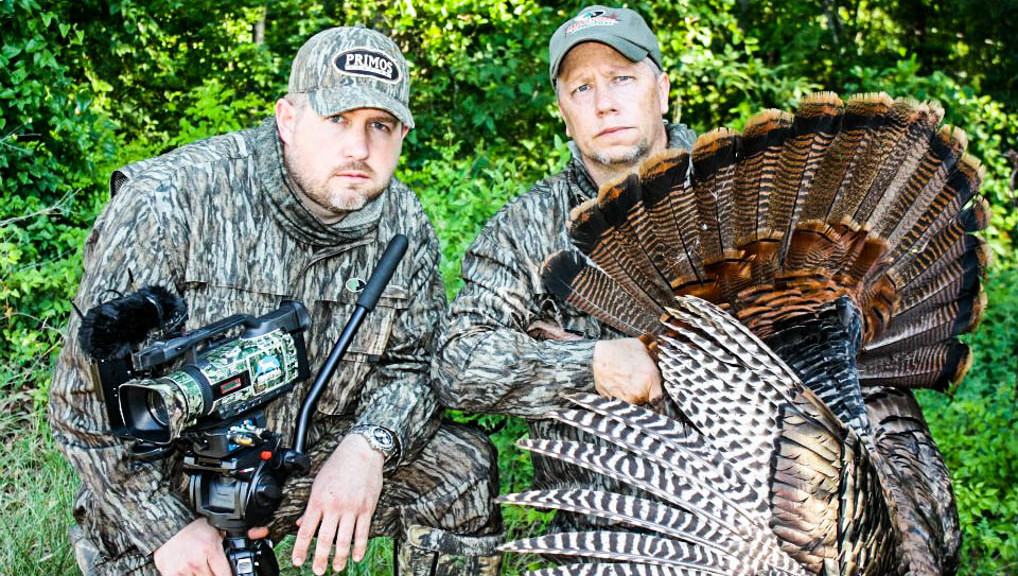
Camo Your Equipment: Anything that shines or sparkles needs to have camo on it. You know as well as I do about the vision a turkey has. I put camo on my tripod and on my camera. This helps eliminate getting busted while filming. It is not a 100% solution, but it does help.
The Set-up: This can make or break your footage. Set-ups are an important key to your success for acquiring footage as it is for giving that bird a dirt-nap. I try to set up in open terrain, not necessarily wide open but in spots where I think I can get the best footage possible. It is difficult to get good footage if you are set up in thick brush or cover. After you find a spot, give a quick glance around to make sure nothing will hinder your movements with the camera. If there is, take care of it right away. Sometimes you will just have to go with what you got, when you have to hunker down quickly.
Ground blinds are much easier to film out of than being in the open and the turkeys don’t seem to mind where you place them. They allow you to make quick movements within the blind without blowing your cover.
Actual Filming: When filming your hunts, you want your footage to tell a story of that particular hunt. Whenever I get set up, I film the scenery around me by panning from right to left. I film everything because in the end, you can edit out what you don’t like but if you don’t have the footage, you can’t add it. Film the sunrises, the other creatures that are out and about, as well as your shooter walking in to your set up itself……film it all. By doing this, not only will you have the footage but it will give you practice with your camera. All of this footage is what we refer to as B-roll footage and it will help tell your story.
Be Prepared: I try to visualize the shot before it happens and practice moving the camera around to make sure nothing is in my way. I try to anticipate where the bird may come from and be prepared to video those areas without obstructions. I like to set up over the shoulder of my shooter so when the bird walks out, I can capture the whole image in one frame. It allows me to focus in on the bird leaving my shooter somewhat out of focus. This also eliminates having to go back and do cutaways of your shooter getting his gun up and flipping the safety off. If you are filming out of a blind, you can film the shooter doing all of this as well before the shot is actually taken.
One very important part to remember is to take your hands off of the camera when the shot is taken. By the reaction of the shot, you are going to jump a little and you don’t want that in your footage. You want to be focused in on that bird and jumping may cause you to shift off of the bird missing the “kill” shot. To give you a scenario of what I try to capture on a hunt goes like this: Press RECORD, get the shooter seeing the bird or pointing to the bird, zoom in on the bird, come back to the hunter if you are not over his shoulder, follow the bird in, then get tight on the bird before the kill. Go back to the shooter to get his reaction after the kill. Remember to use smooth motion when panning back and forth. Film your shooter walking up to the bird, give a quick interview of how the hunt played out, and show off the fan, beard, and spurs if you like. I like to keep the conclusion of story short and simple. After all of this, I like to film the shooter walking away with the bird over his shoulder.
Like I said, if you forget any of this, you can go back and do your cutaways of the hunter; however it is sometimes tough trying to re-create the excitement of the shooter. It is very important to keep the bird in the center of your frame and stay in focus, especially if the bird goes behind brush or trees. You will actually lead him while he is walking into your set-up. Try not to zoom in and out repetitively and keep your zooming smooth. Here are a few things that I try to avoid in my footage. No cursing, no chewing tobacco (which I am guilty of), no spitting and no alcoholic beverages being consumed. Clean kills are your priorities so if the shot doesn’t present itself, don’t shoot.
I would highly recommend getting someone to help you film. It is hard to get good quality footage doing it alone. Your footage will never be as good by yourself as opposed to someone else filming it for you.
And most importantly, always remember to press “RECORD”.

By Roger Petty
Ronnie Smith Outdoors
